Git for Beginners: Basics and Essential Commands | Git & GitHub
When you first start learning Git, the most common question is: How does Git actually track my project? Even when we don't see anything happening on the screen, how does Git know exactly what line changed?
In this guide, we will break down the essential commands you need to know to work like a professional developer.
How Git Tracks Changes
When Linus Torvalds built Git, he needed a place to store changes without relying on external servers. His solution was brilliant: The .git folder.
When you initialize Git, it creates a hidden folder named .git inside your project. This folder acts as a local database that records every single change.
Scanning: Git scans your files for changes.
Diffing: It marks lines as
+(added) or-(removed).Hashing: It generates a unique ID (Hash) for every save.
Note: The
.gitfolder is hidden by default so you don't accidentally delete it!
The Essential Workflow
To use Git effectively, you only need to master a few core commands.

1. git init (Start Here)
This command tells Git: "Start tracking this project."
git init
What happens: Git creates the hidden .git folder. You only run this once per project.
2. git add (The Staging Area)
Writing code doesn't mean Git is tracking it yet. You have to tell Git which files to prepare for saving. This is called "Staging."
git add file.js    # Stage a specific file
git add .          # Stage ALL files (Recommended)
Analogy: Think of this like putting a parcel in a box. You haven't mailed it yet; you're just packing it.
3. git commit (The Save Button)
Now that your files are staged, you need to permanently save them.
git commit -m "Added login feature"
What happens:
Git saves a snapshot of your files in the
.gitfolder.It generates a unique ID (e.g.,
abc123d).It clears the staging area for your next work.
4. git log (Check History)
Want to see what you've done? This command shows your history.
git log                 # Shows full details
git log --oneline       # Shows a short summary (Recommended)
Important Concept: HEAD 🧠
You will often hear developers talk about "HEAD."
HEAD is simply a pointer to your latest commit.
It tells Git: "This is where we are standing right now."
When you make a new commit, HEAD automatically moves forward to that new commit.
Fixing Mistakes: Revert vs. Reset
We all make mistakes. Maybe you broke the code or deleted the wrong file. Git gives you two ways to fix it, but one is safe and the other is dangerous.
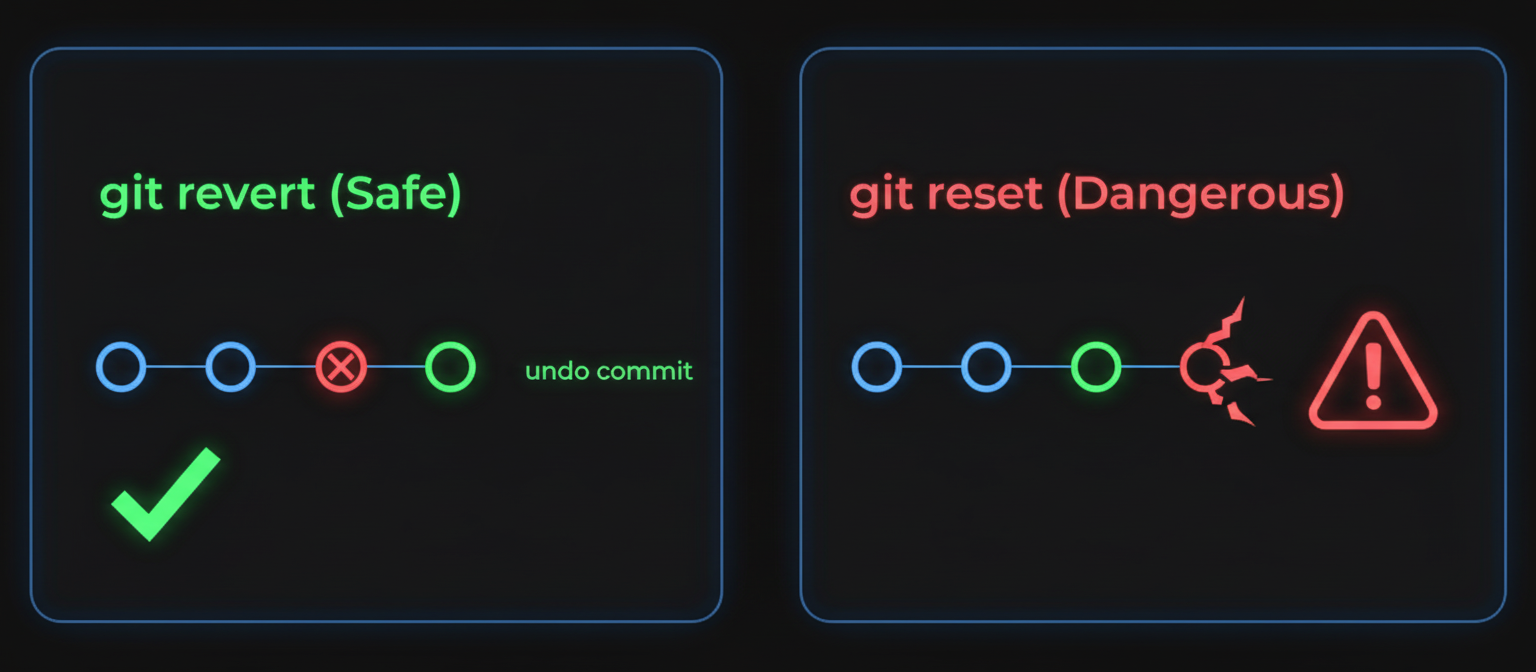
Figure 2: Why you should choose Revert over Reset in professional teams.
✅ The Safe Way: git revert
This command undoes a mistake by creating a new commit that reverses the changes.
git revert <commit-id> # Commit hash ID obtained after making a commit
- Why it's good: It preserves your history. You can see that a mistake happened and was fixed. This is great for teams.
⚠️ The Dangerous Way : git reset --hard
This command deletes everything after a specific point.
git reset --hard <commit-id> # Commit hash ID obtained after making a commit
Why it's risky: It completely erases history. If you reset, those later commits are gone forever.
Professional Advice: Avoid using this in team projects. Once you delete history, you can't get it back easily.
Summary
git init→ Create the repo.git add .→ Stage your changes.git commit -m "msg"→ Save your changes.git status→ Check what's happening.git log→ View history.
Master these, and you are already ahead of 90% of beginners
You can find more of my work at abdulrdeveloper.me
Read more posts at blog.abdulrdeveloper.me